Cheesplosion and Sourdough Crackers
August 3, 2013

So this is a first! I set up some cashew cheese to culture overnight, and it rose so much that it pushed off the lid and overflowed! The jar really wasn’t that full either, maybe 80% full! Dramatic. The only thing I did differently was using miso instead of salt, so maybe that allowed the yoghurt culture to grow more than usual. Anyway, it tastes good, and no different from any other time.
I’ve put it and my kimchees in the fridge now so there’s currently nothing stinking up the house and attracting fruit flies.

This is the result of me trying to make a rye sourdough loaf, and the dough not rising whatsoever. I thought maaaybe if I roll it out flat and bake it it’ll make good crackers. And it did! They taste really good, just like the loaf I had hoped for! They’re a little hard in places, but that’s ok. At least I didn’t have to chuck the whole lot away.
Saturday night kimchi.
July 27, 2013
A Saturday night spent in making kimchi is a Saturday night well spent. For the last few years that I’ve been making kim chee, I’ve been using ordinary white cabbage, same as I would for sauerkraut, as I found I enjoyed the texture more. But today I decided to give the old Chinese cabbage a chance again. I know traditionally the cabbage for kim chee is soaked in super salty brine for a few hours or overnight before mixing with the spices, but I chose to skip that step too, in the hopes of retaining a bit more texture and crunch. Since I wasn’t soaking in salty brine, I used the same proportion of salt per weight of cabbage as I would for sauerkraut, which is 3 tsp per pound. Hopefully all will be well! I made three separate batches, and while at first I was concerned that one head of cabbage was gonna make way too much chee for me, it actually wilted down even more than I expected after salting.

 So
So
So I chopped up that big ol cabbage into bite sized pieces, tossed in about four tsps of sea salt cos it was over a pound weight. I minced up three or four cloves of garlic and a thumb of ginger, mixed that in, then a tsp of chili powder. Then I divided it into three, not very evenly as it turns out, as evidenced by the pics. I added some nori flakes and black beans to one batch (the fermented kind), a little kelp powder to the second batch and just a pinch of sugar to the last one. I bought that kelp to make fake tuna salad out of chickpeas, but I think it’s fairly disgusting, maybe it’ll be nice in kimchee, mostly disguised by all the other flavours. I didn’t add much anyway so it can’t be too bad.
Chickpea Tempeh and Sourdough bread.
July 21, 2013
Well hello there! It’s hot, so it’s an excellent time to ferment things, no need to fiddle around with hot water bottles and light bulbs in order to keep something warm, my house is around 30 degrees Celsius right now, so what better time to make some tempeh! Living in a studio apartment as I do these days, it seemed like a boon to be able to do this without my lightbulb-in-a-coolbox method, as having that light shining all night long was a bit of a bummer.
So I decided since I didn’t have soybeans to hand, and I had wanted to experiment with other types of tempeh, I would try chickpeas. I soaked em overnight, cooked em like I would have the soybeans, just until they were crushable, but not fully cooked. Dried them off, rubbed off as many hulls as possible but wasn’t super careful about that, mixed in the starter when they felt like they were around 30-35 degrees, and packed them into a sandwich bag, punctured many times in a frenzy of stabbing.
The tempeh cultured in the right amount of time, but it really didn’t turn out as well as my previous soybean tempehs have. I am pretty sure I should have broken up the chickpeas a bit, maybe kinda chopped them. Soybeans are smaller, and they seem to break in half when you’re drying them usually, so that results in better bean to bean contact, which makes it easier for the tempeh mycelium to connect everything into one big lovely mouldy mushroomy cake of beans. Here is the less than perfect result…it looks MESSED UP! Well, especially if you’re not used to tempeh at all. But it tastes just fine.

Last week I paid a visit to my friend and ex-colleague, Kerstin (http://marmitelover.blogspot.co.uk/) to nab some of her sourdough starter. I experimented with sourdough several years ago with not particularly great results, I hated having to chuck out a portion of the starter in order to keep it at a manageable volume when feeding it, since I wasn’t baking bread every day with it. I think I didn’t posess a fridge in those days, so now that I do, I knew I could store it in there in between uses, and that would keep it kind of dormant for at least a couple of weeks if needed. So I decided to give it a bash again having recently eaten some really good sourdough bread from E5 bakehouse.
Here tis!

The 314g written on the jar is the weight of the empty jar. This is quite a useful tip if you’re feeding your sourdough using a scales rather than cup measurements. The idea is to double the weight of your culture every time you feed it, so this way you can weigh the entire jar and then easily calculate how much water and flour you need to add. I’m doing 100% hydration, meaning the culture is 50% flour and 50% water. Just cos that’s how it was when I got it, and it’s easy to work out in your head how much of each thing to add.
Here’s my first and so far only loaf

So, it turned out really good compared to the attempts I made years ago, which I recall being flatter than this and just hard and crappy. This had a good texture and I really liked the crust, the only thing I found disappointing is that the flavour wasn’t very complex, which is what I’m looking for, but since it’s my first try, I reckon I can get there. This loaf had quite a small amount of wholewheat flour and mostly white, and also not quite enough salt for my tastes. Oh and I’m gonna try making it in a loaf pan next time because while I love the look of these li’l shaped loafs baked on trays, they do bug me because I eat toast for breakfast every day, and I hate having to slice like 7 tiny slices off when if it was the right shape, two or three would do.
Pink ginger beer and pink wine.
March 13, 2013
Yeah I know, seriously, where are all these beets coming from? I’ve just been getting a lot of beets, first in the organic veg box which I get occasionally, and then I skipped like 10k…so yeah. This here is my most creative usage of said beets, like as in I actually came up with the idea on my own. I consider wine as a fallback for when you have no other ideas, and pickles are like…obvious.

So, ginger beer is something I make from time to time, and we did also have a lot of ginger, so I decided to try making a beetrooty ginger beery soft drink, figuring the flavours would work together. I dissolved a cup of white sugar in a litre of boiling water, along with the juice of a lemon, and about two thumbs of ginger, chopped up. I also added about a tsp of molasses cos it goes well with ginger and I have a jar languishing in my cupboard, but it’s not particularly necessary. Waited for a while, letting it all steep. Juiced 3 large beets, then made that juice up to a litre with cold water, mixed the two, added half a tsp of wine yeast, although bread yeast would do fine too, but since I have wine yeast I used it. Poured it into a 2l bottle, squeezed out the excess air, and placed it in a picnic cooler box thang with a hot water bottle to get it going. I checked on it a few hours later and the bottle was already extremely firm so I took it out of the cooler, let out the gas and since I was going out for the night, I let it sit on the counter with the top unscrewed in case it might ‘splode while I was gone. Not dealing with that kinda mess with a hangover! Stuck it in the fridge after approximately 42 hours, could even have been 48 though, I wasn’t counting really, and oh mah blorg it’s amazing, I couldn’t be happier with it. I won’t bother posting a pic of the finished product because it looks much like the picture above anyway. The molasses flavour is actually more pronounced than I thought it would be, which I don’t always like, but it works really well in this anyway.
ALSO! Pink beetroot wine. This is nothing special, but hopefully it’ll taste just as good as mah ginger beer. Boiled up 3lbs of beets in 4.5l water, added 3lbs sugar, some lemon, wine yeast and yeast nutrient, a teabag, and it’s still sitting in the primary fermenter right now. Voila…

Oh and some ginger! Those are the chunks floating in it. You can’t see in the pic, but my ‘primary fermenter’ is just a bucket I found outside a chip-shop, which I think used to contain pepperoni cos it says pepperoni in big letters but the only picture on it appears to be cabbage. Hm.
I’ve been trying to eat the leftover beet chunks but it’s getting tiresome. Wah. Hate to waste but I’m pretty sure I’m not gonna be able to eat them all. And I’m thinking they might not have much nutrition left in them now anyway having been boiled for 40 mins.
The New Beet
February 16, 2013
Made more fermented beets for Borscht! Didn’t let them go mouldy this time! Feast your eyes upon their glory! 


Purdy huh? I love how when you ferment beets like this, in salty water, the water thickens so much that it has the consistency of blood. As if beets weren’t already a bit gruesome. I don’t know any other vegetable where this thickening happens. It is coool. Makes a very excellent soup too, which is really simple despite the maybe daunting element of fermenting the beets. Once you have the hang of that, you just consider it prep like any other kind of prep, and when you’re ready to make your soup, you just fry up some onions, potatoes, carrots, cabbage/mushrooms/celery/kale, whatever you got lying in your fridge, add salt, pepper and boullion, simmer a while, add your fermented beet chunks, and simmer until everything’s soft enough to nom in a chilled out soup slurping manner. Damn it’s good. And I don’t know if any cultures survive the simmering, but even if not, Borscht still seems like healthy stuff.
Curtido
January 2, 2013
Curtido is an Ecuadorian thang, not something I hear about much, but it’s a welcome and hella tasty alternative way to ferment cabbage. I wish it weren’t so, but honestly, homemade sauerkraut is not always top of my list on things to eat. Shop bought…yesssss…so much more vinegary and extremely finely cut…but homemade it’s just ok. Homemade kimchee I can eat quite a lot of, but not everyone feels the same, so it’s often something I cook when eating alone. Curtido though, is much more of a crowd pleaser. It actually doesn’t even need to be fermented really, being more of a salad/relish than a ferment, but it certainly doesn’t suffer for being fermented if you should choose to do so. So a few weeks ago when I got a huge cabbage for £1, I made one jar of kimchee and one of this dreamy stuff.  Here is a link to the recipe I based mine on http://low-cholesterol.food.com/recipe/curtido-de-repollo-el-salvadorean-cabbage-salad-207798 , but it’s a flexible thing, like a lot of very traditional foods, and there are many differing recipes out there. I added in red peppers, because I remembered a friend making it a few years ago with them, and I thought they were yummy in it. She also made her own pineapple vinegar, especially to use in curtido, as it is a traditional ingredient, and it was delicious, but if you can’t be bothered with that, I fully recommend making it with cider vinegar/white vinegar anyway.
The smell of this stuff makes my mouth water, and I’ve been properly craving it, mostly eating it on toast with some of that cashew cream cheese I posted about earlier.
Beetroot!
January 2, 2013
I got some gorgeous beetroots in my first ever veg-box about a month ago, and then left them a bit too long until they were kind of soft. I felt a bit bad about that, shoulda used them when they were fresh, but anyway, I peeled them, cubed them, and covered them in salty water, actually, a bit too salty, I didn’t measure anything and went a bit overboard, I tried the liquid a few days later, thinking it would be nice and sour already but it was just intensely salt-tastic. I diluted it with more water, hoping the decreased ration of salt to other matter would help it ferment, and yup, it did. I think it took over a week for me to be satisfied with the flavour enough to cook with it. Made loads of Borscht – I hope that’s a legit spelling, there are like 15 different ways to spell it and probably many more ways to make it, and every way I’ve tried it, I’ve loved it. SADLY I further mistreated my beetroot babies by leaving the jar on the counter for a week while I swanned off to Ireland for Xmas. When I came back…
Cashew Cream Cheese
October 12, 2012
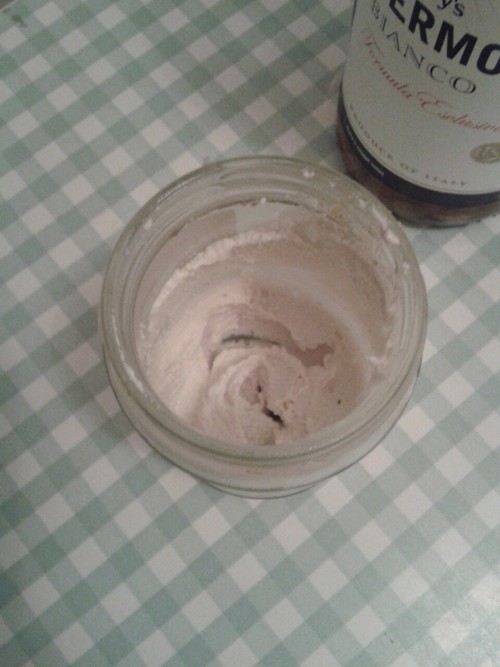
This stuff is really simple, just an extra step on top of yoghurt making. I found a recipe on a blog I like, http://www.yourveganmom.com, which was originally a recipe by Miyoko Schinner, who has written a book on vegan cheesemaking. Yay! Want. Even though I bought the Uncheese Cookbook ages ago and never use it. Still want. Sigh.
So all you do is soak some (about a cup) cashew nuts in water for a while, blend them up til they’re as creamy as you can get em, then add a pinch of salt, and a tablespoon of yoghurt, then let the mixture sit for anywhere between 8 and 24 hours depending on how warm it is where you are. I left it for 24 hours cos it’s a bit chilly here right now.
It’s good! I’m not as enthused as Vegan Mom about it, I don’t think it’s very much like dairy cream cheese, or even Tofutti. But I ate it this morning with jam on white toast, and was pretty pleased with that, so pleased that I had it again two hours later. It has the fatty creaminess that I really want in my life quite a lot, so I think I’ll be making it again. And of course it gets mad points for being super wholefoody, probiotic and vegan-proteiny, while seeming super decadent.
Tempeh, Coconut Yoghurt.
September 27, 2012
I’m on a veritable fermentation bender! Drank most of the ginger beer last night with whiskey and ice, and it was grrreat.
I’ve been making yoghurt for years, it was possibly the first thing I ever fermented myself? Maybe a stab at sourdough was first. It’s a piece of piss, all you do is get a clean jar or plastic container, or if you have some kind of flask or insulated coffee cup, that’s even better. Mix about a tablespoon of live yoghurt with anywhere up to half a litre of milk (I find unsweetened soymilk is the best) and put the jar in a warm place for 6 to 8 hours. I LOVE coming back to the jar and opening it up to find that smoooooth wobbly white yoghurty mass has all come together and done it’s thing, it’s a beautiful moment. *bows head earnestly* Anyway, I think once years ago I tried making it with coconut milk and I decided I didn’t like it. It came out really thin and crap. But maybe the coconut milk I used was thin and crap in the first place, as a lot of it is. So, inspired by the appearance on the market of extremely expensive live coconut yoghurts, I decided to give it another crack. I thought this time, I’ll try to make it come out thicker, I’ll get powdered coconut milk and make a thick cream of it….hmmm…well, it still came out a bit thinner than I wanted, in fact, it fooled me for a moment, because it was doing that thing that coconut milk does in the can, the thick creamy stuff rises to the top, then when you break through that, you’ve got really watery stuff underneath.
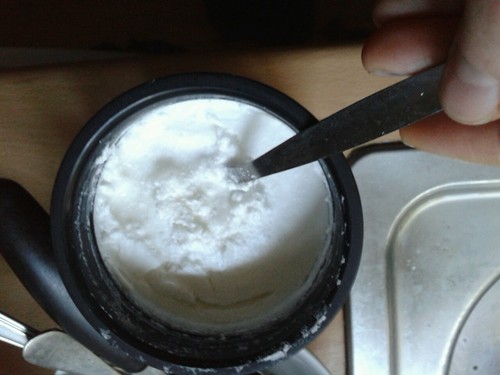
In conclusion, it tastes good, I’m currently drinking it as a lassi with mango puree. So I’m gonna try to make an EVEN THICKER coconut cream next time, and if that still turns out funny, I’m going to maybe try mixing coconut powder with soymilk, which I suspect would help a lot to eliminate the wateriness.
Also! Tempeh pictures! I used the same method to make tempeh as last time, but last time I didn’t have a smartypants phone to take half decent pics with, so here’s some…
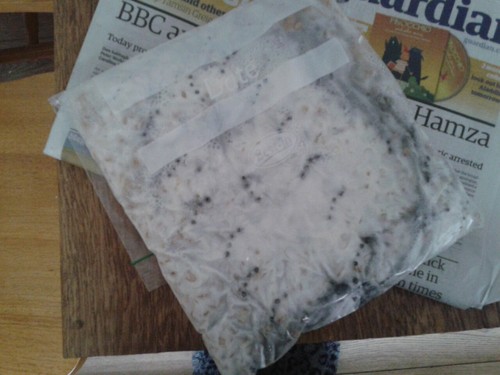
Still in the bag it was made in. Sexy.

Chopped into manageable blocks, relaxing in the morning sunlight. Also sexy.
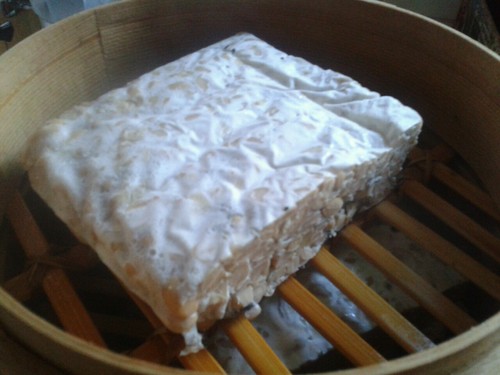
Enjoying a steam bath. Sexxxaaaayyy.
After this, I popped the blocks into plastic lunchboxes with salt and water, in which they are currently marinating in my fridge. I’ll freeze half or three quarters of it, and keep at least one of those blocks in the fridge to eat soon.
Lavender wine, ginger beer.
September 23, 2012
Hello folks, it’s been a while! I’m feeling fermenty again though. Mainly, I decided I wanted to brew some lavender wine, because my friend had made some, and I tried it, a little reluctantly, considering his warning ‘Some people say it tastes like soap, some people say it tastes like their granny’s wardrobe…’. But actually, I loved it, and could definitely chug a few bottles of it. I need to be a bit more diligent about the process this time though, the last few wines I’ve brewed failed or turned out just a bit yucky, and I think it’s because I got cocky and thought I could just forget about them, I don’t think I really racked any of them until I was bottling…I shall do better this time. Here’s a pic of the must! 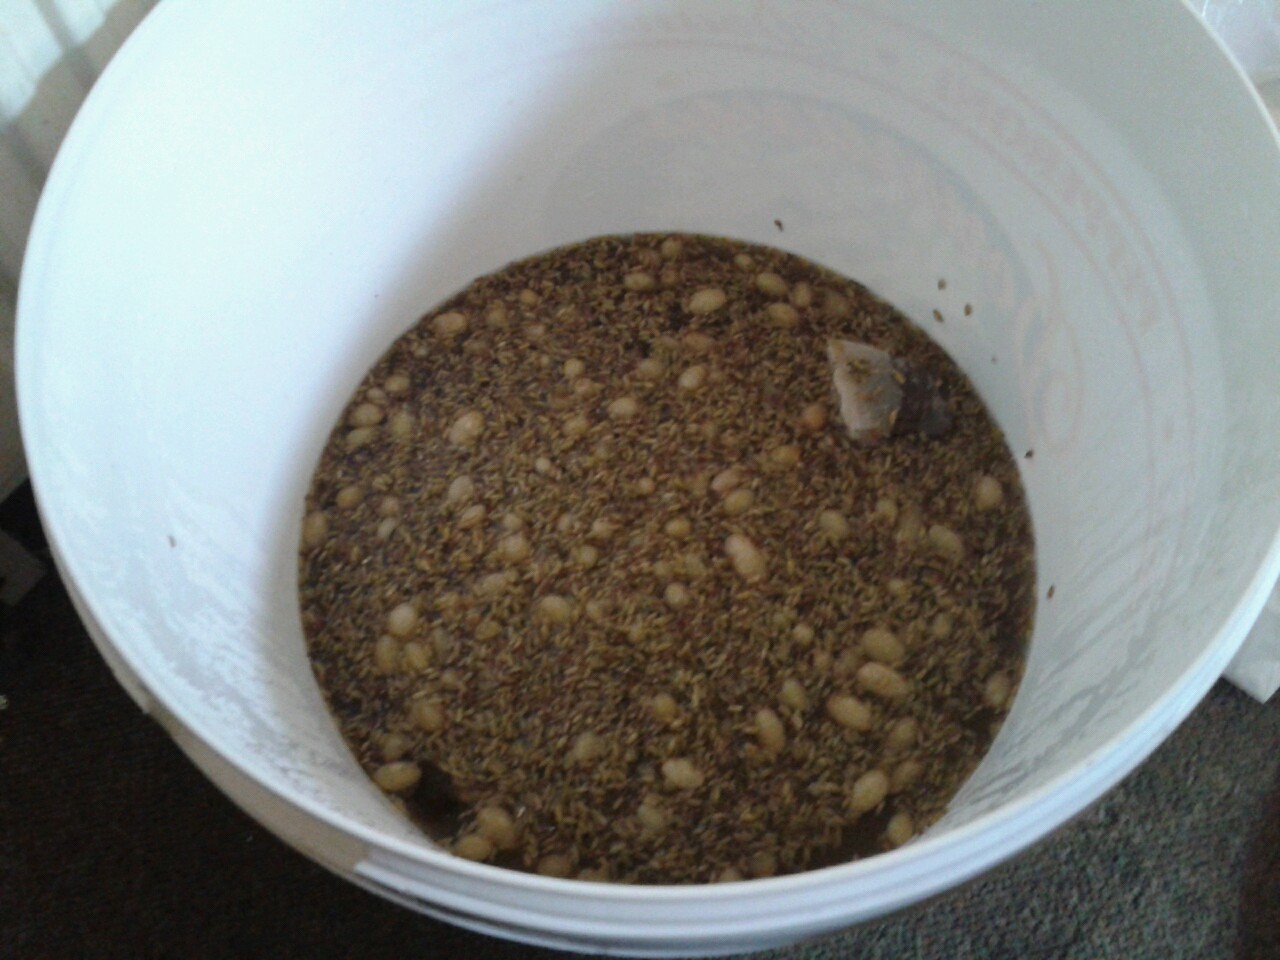
Lavender flower, some fresh, some purchased from the Wholemeal shop, Well St, E5. Plug plug. It’s a nice shop run by a nice man. Also used sultanas, a teabag for tannin, wine yeast, nutrient and citric acid.
So, it’s as easy to ferment multiple things as it is to ferment one, as long as you have enough space. If you’re gonna be using some kind of radiator based set-up to keep things warm, that’s going to be warming a larger area than just one batch, so I decided to get some ginger beer going too. That’s a short ferment, and I just googled for a recipe and found one for which I had all the ingredients at hand. Really all it is is making gingery sweet water, chucking in some yeast and letting it get fizzy over the course of a few days. There will be some alcohol in the resulting brew of course, and the longer you let it ferment, the more booze there will be. I plan to start drinking this four litre batch on Monday, and see how it progresses by the time I’m finished with it.
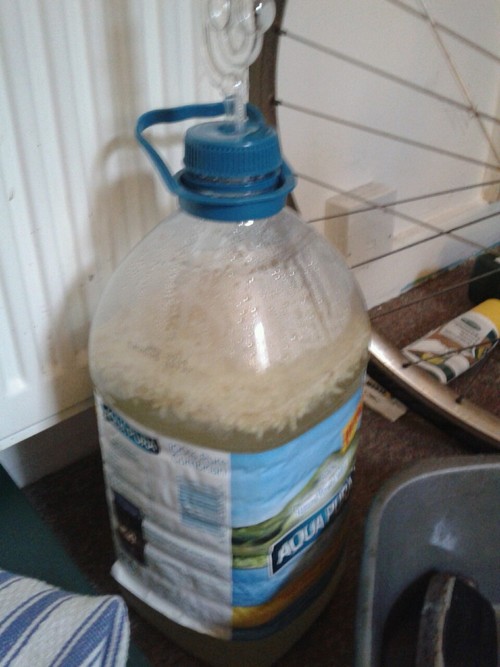
Excuse the fuzzy pic, tbh there was no way this was going to be a ‘nice’ pic regardless so I didn’t put in any effort. As you can see, it’s just a re-purposed water bottle, which I found in a neighbour’s recycling. Thank you neighbour! The lids of these bottles are soft enough to pierce quite easily with a nail, a skewer, a metal knitting needle, whatever you got. A pen would do the job I’m sure but then you might get it a bit inky…Then you can shove your airlock into it and Bob’s your uncle.
I think you could do this one without an airlock, if you trust yourself to let the gas off every once in a while. Especially with as much room in the container as you can see here, and since it’s a short ferment, it would probably only fill up with gas a couple of times. But seriously, be careful with this kind of thing, even plastic bottles can hurt you real bad if they explode on you.
UPDATE!
I’m currently drinking some ginger beer. Honestly, this recipe was a smidgen on the weak side, both in gingeryness and sugaryness I think. So I drank some yesterday, but didn’t decant the whole lot, I added some more sugar and some dried ginger powder and let it keep fermenting. I like it better today. I’m doing the same again, see how boozy it’ll be by Friday.
